Easy Tips in Finding and Removing Duplicate Data Using Excel
We listed the tips on how to deal with the duplicate records in your marketing list using Microsoft Excel. Read more here.
Duplicate value, duplicate records, multiple contacts, duplicate data, no matter what you call them, they are still considered as one of the biggest problem in having good data quality, not just in a calling list but also in an emailing list.
A successful marketing campaign requires the right data to use. When I say “right data” it means, no same records within the list. If your data consists of duplicate records, it can be a bit frustrating on the side of the Sales Rep as well as the prospect. Having to call the same number, within your list may result to DNC (Do Not Call). Also, by sending the same information on the same email addresses within a list can lead to DNE (Do Not Email).
One of the tools that you can use in finding duplicate records is Microsoft Excel. You have to do it manually though, but it’s as easy as few clicks. However, If you have higher volume of records within your list and you don’t have enough time and resources to do this, you can always outsource a company to profile the list for you or check some resources to get your own marketing list. What’s good about outsourcing is, you don’t only remove duplicate records, you can even ask them to call the list for you and update the information within your list as well.
Here are some tips on how to filter for unique values and remove duplicate contacts within your calling list using Microsoft Excel.
Arrange the company name into alphabetical order (As shown in Figure 1 below).
Figure 1
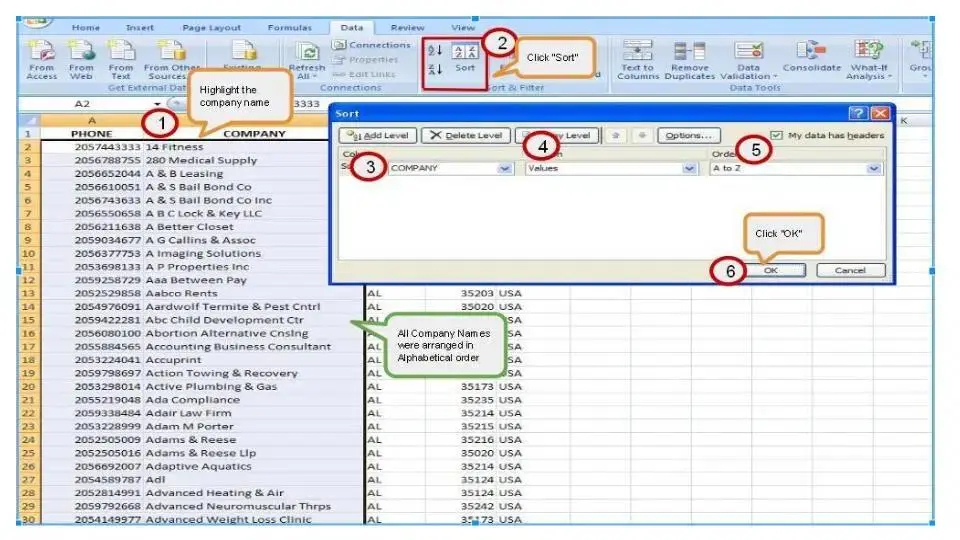
- Highlight the column “Company”
- Click “Sort”
- Sort on “Column”
- Sort on “Values”
- Select “A – Z” to arrange it alphabetically
Highlight the column that you want to check for duplicates (As shown in Figure 2).
Figure 2
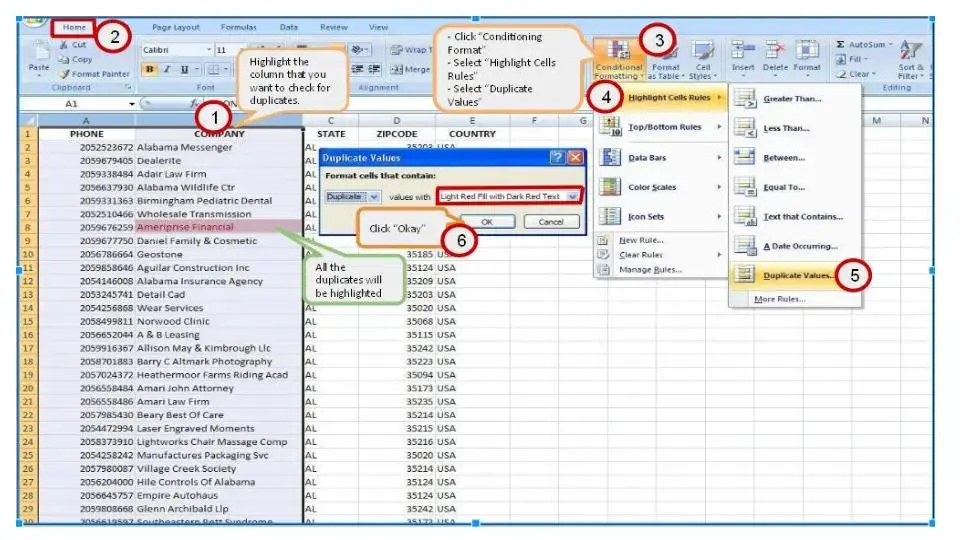
- Highlight the column/s that you want to check for duplicates
- Click “Home”
- Click “Conditioning Format”
- Select “Highlight Cells
- Choose Duplicate Values
- Change the Fill Color (If necessary)
- Click “Ok”
- All duplicates are highlighted
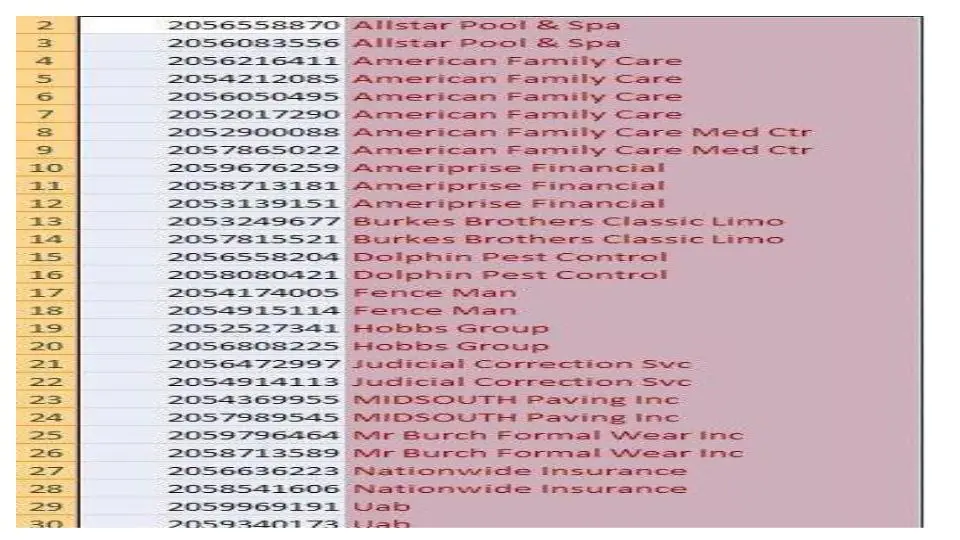
Now, filter all highlighted contacts so you can view all the duplicate records. (As shown in Figure 3 below)
Related: Global Media Runs on Accurate Market Data
Figure 3

- Highlight the column with highlighted duplicates
- Click “Sort”
- Select “Company”, “Cell Color” and “On Bottom”
- Click “OK” to see all highlighted duplicates at the top of your worksheet as shown in Figure 4 below.
Related: Callbox Data Profiling A Major Coup for Exhibition Leader
Figure 4
Remove all duplicates as shown in Figure 5 below.
Related: AskCallbox: Where do you get the list?
Figure 5
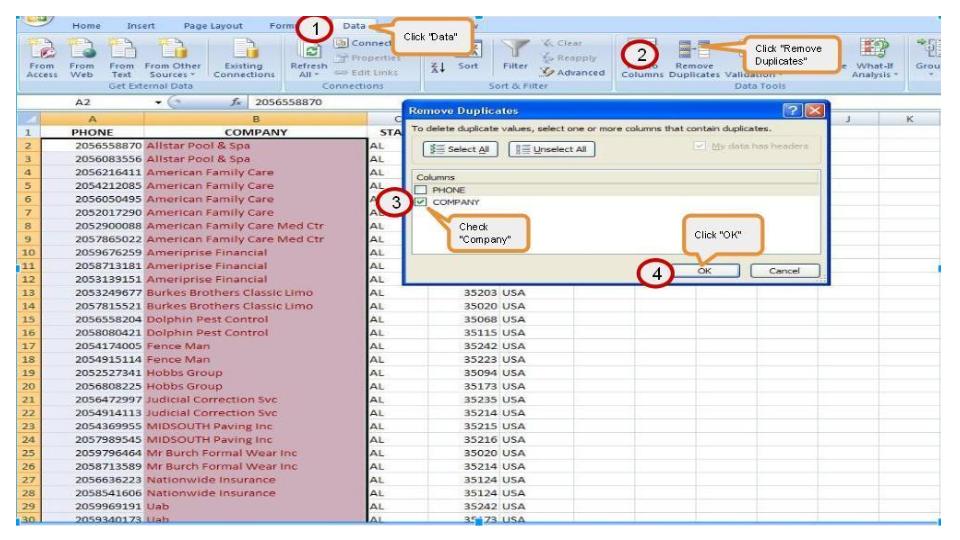
WARNING: When using “Remove Duplicate” feature, the duplicate data will be deleted permanently. So it’s best to copy the original data to another worksheet before deleting the duplicates so you won’t accidentally lose any information.
After removing the duplicates, you will see companies still highlighted in red. This is normal as they are now considered as unique contacts